 Kes Faucets









How to Replace an Old Tub Faucet: A Step-by-Step DIY Guide (2026)
浏览次数:192 分类:Install
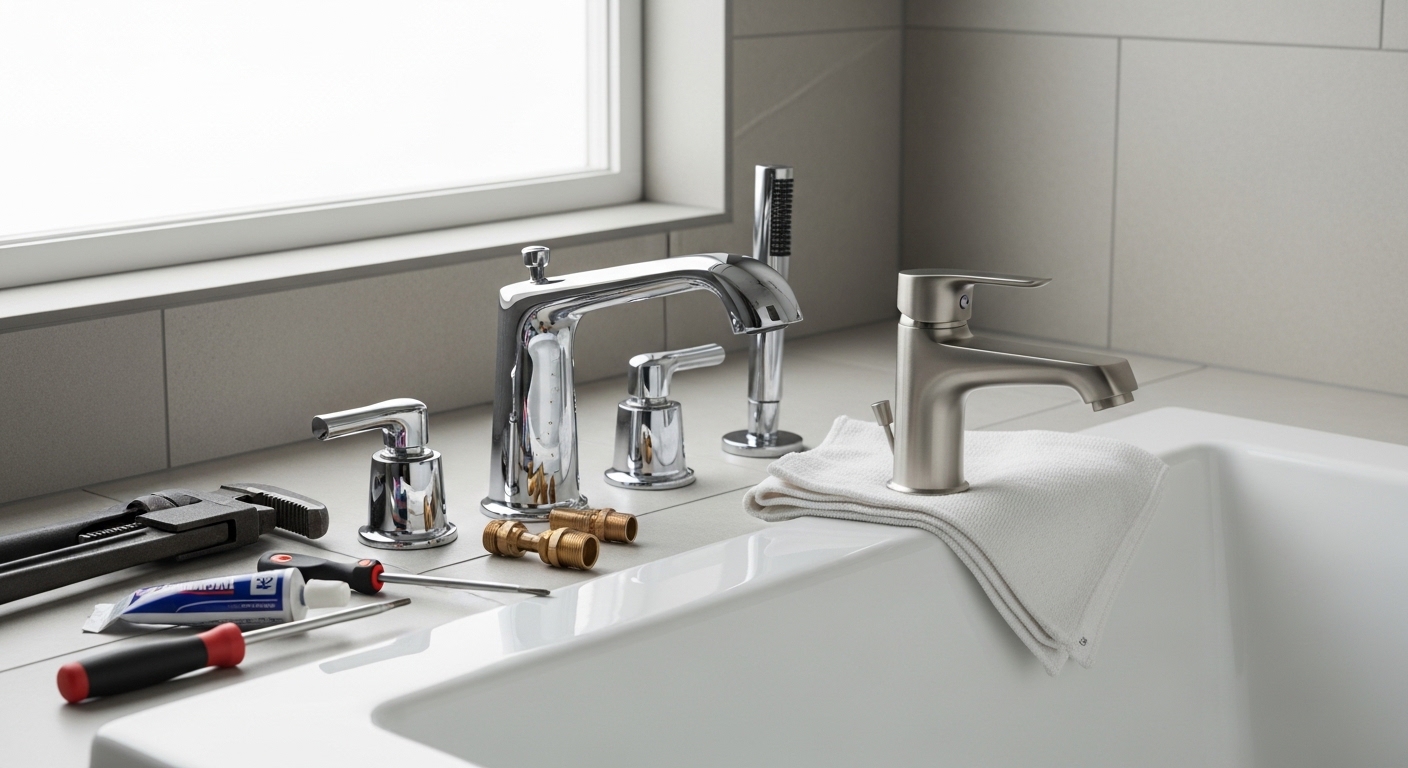
Learning how to replace old tub faucet hardware is one of the most satisfying bathroom upgrades a homeowner can tackle without hiring a pro. A dripping, corroded, or chalky tub spout doesn’t just look dated — it wastes water, dribbles instead of diverting to your shower head, and can hide bigger plumbing problems behind the wall. The good news is that most tub faucet swaps take under two hours with basic tools, and you don’t need to open the wall or solder a single pipe if your valve is in good shape.
Below, we’ll cover the faucet types you might be dealing with, the exact tools you need, and a clear step-by-step removal and installation process. We’ll also flag the small details — like spout type and thread pitch — that trip up most first-timers.
How to Replace an Old Tub Faucet: What You Need to Know First
Before you buy anything, understand what “tub faucet” actually means in your bathroom. For most people the term covers the tub spout (where the water pours out), the handles or single lever that control temperature and flow, and sometimes the diverter that sends water up to the shower head. These parts may be sold separately or as a matched trim kit.
The single most important thing to confirm is whether you’re only replacing the trim (the visible spout and handles) or the valve body hidden inside the wall. Swapping trim is a beginner-friendly job. Replacing the rough-in valve usually means opening the wall and is a job many homeowners hand to a licensed plumber. In this guide we focus on the far more common trim-and-spout replacement, where your existing valve still works fine but the fixtures look tired.
If you’re unsure whether your new fixture will fit your existing plumbing, read our guide on how to check faucet compatibility before buying first — it can save you a frustrating return trip to the store.
Types of Tub Faucets and How They Mount
Tub faucets aren’t one-size-fits-all. The configuration you have determines what you can buy and how hard the swap will be. Here are the common setups:
- Single-handle wall-mounted: One lever controls hot, cold, and volume. Most common in modern tub/shower combos.
- Two-handle (center-set or widespread): Separate hot and cold handles flanking the spout.
- Three-handle: Hot, cold, and a center diverter handle — common in older homes.
- Deck-mounted (Roman tub) faucet: Mounted on the flat ledge of a drop-in tub rather than the wall.
- Freestanding tub filler: A floor-mounted column for standalone soaking tubs.
The spout itself comes in two attachment styles, and knowing which you have is critical before you head to the store.
Slip-Fit vs. Threaded Tub Spouts
A slip-fit spout slides over a smooth copper stub pipe and is secured with a small setscrew underneath (usually a hex/Allen screw). A threaded spout screws directly onto a threaded nipple coming out of the wall. You can usually tell which you have by looking underneath the spout: if you see a tiny setscrew, it’s slip-fit; if not, it almost certainly threads on. Buying the wrong type is the number-one reason a tub faucet replacement stalls halfway through.
| Tub Faucet Type | How It Mounts | DIY Difficulty | Best For |
|---|---|---|---|
| Slip-fit spout | Slides over copper stub, setscrew underneath | Easy | Modern tub/shower combos |
| Threaded spout | Screws onto wall nipple with thread tape | Easy | Standard wall-mounted tubs |
| Single-handle trim | Cartridge valve + escutcheon plate | Moderate | Sleek, one-lever control |
| Three-handle trim | Three separate stems/cartridges | Moderate | Older homes, separate diverter |
| Freestanding tub filler | Floor-mounted rough-in supply | Hard (often pro) | Standalone soaking tubs |
Tools and Materials You’ll Need
Gather everything before you start so you’re not running to the hardware store mid-project with the water off. For a standard spout-and-trim replacement you’ll want:
- Adjustable wrench or pipe wrench
- Hex/Allen wrench set (for slip-fit setscrews and handle screws)
- Flathead and Phillips screwdrivers
- PTFE plumber’s thread-seal tape (Teflon tape)
- Plumber’s putty or 100% silicone caulk
- Old rag or towel and a small bucket
- White vinegar or a descaler for mineral buildup
- Your new tub spout, handles, and trim kit
- Optional: a strap wrench to grip a finished spout without scratching it
A quick tip: lay an old towel over the tub floor before you begin. It protects the surface from dropped tools and stops small screws from disappearing down the drain.
Step-by-Step: Removing the Old Tub Faucet
With your tools ready, here’s the removal sequence. Take a photo of your existing setup before you disassemble anything — it’s a handy reference when you reassemble.
Step 1: Shut Off the Water Supply
Find your shutoff. Some homes have dedicated valves for the tub behind an access panel; most do not, in which case you’ll close the main water supply to the house. Once it’s off, open the tub faucet to drain any pressure and confirm the water is truly stopped. Plug the drain so nothing falls in.
Step 2: Remove the Old Tub Spout
If your spout is slip-fit, loosen the setscrew underneath with a hex wrench and pull the spout straight off the copper pipe. If it’s threaded, turn the spout counterclockwise (lefty-loosey) by hand or with a wrench wrapped in cloth to avoid scratching. Decades of mineral scale and old thread tape can make threaded spouts stubborn — steady pressure usually wins. If it won’t budge, insert a sturdy screwdriver or wooden dowel into the spout opening for leverage.
Step 3: Remove the Handles and Trim
Pry off the handle index cap (the little hot/cold button), remove the screw beneath it, and pull the handle off the stem. Unscrew the escutcheon plate and trim sleeve. You may see the valve cartridge or stem behind it — if your only complaint is a drip, this is the part you might replace instead of the whole fixture. Understanding the difference between hot and cold faucet valves helps here, especially on two- and three-handle setups where the cartridges are side-specific.
Wipe down the exposed pipe stub and wall opening. Scrub away old thread tape, putty, and mineral deposits with vinegar so the new fixture seats cleanly. A clean surface is the foundation of a leak-free install.
Installing the New Tub Faucet
Installation is essentially removal in reverse, with a couple of sealing steps that make all the difference between a watertight job and a callback.
Step 4: Prep and Seal the Connection
For a threaded spout, wrap fresh PTFE tape clockwise around the wall nipple threads — about three to four wraps. This lubricates the threads and creates a seal. For a slip-fit spout, you typically don’t tape the pipe; instead you’ll run a thin bead of silicone where the spout meets the wall to keep water from wicking behind it. Always follow the manufacturer’s specific instructions, since some brands include an O-ring that does the sealing for you.
Step 5: Mount the New Spout, Handles, and Trim
Thread or slide the new spout into place. For threaded spouts, hand-tighten until snug and the spout points straight down — never force it past level, as overtightening can crack the fitting. For slip-fit, push it onto the stub and tighten the setscrew. Reinstall the cartridge or stems, escutcheon plate, and handles, snugging each screw without stripping it.
If you find the spout sits too far from the finished wall or the stub pipe is too short, you may need a spout extension — our walkthrough on how to install a tub spout extension covers that exact fix in detail.
Step 6: Test for Leaks
Turn the water supply back on slowly. Run both hot and cold, check that the diverter sends water up to the shower head and back down cleanly, and watch carefully around the spout base and handles for drips. Run it for several minutes. A slow seep that appears after a few minutes is easy to miss but signals a thread or seal that needs another quarter-turn. Once everything is dry and the diverter works smoothly, your replacement is complete.
Common Mistakes to Avoid
Even a simple tub faucet swap goes sideways when these details get overlooked:
- Buying the wrong spout type. Always confirm slip-fit vs. threaded before purchasing.
- Overtightening. Brass and plastic fittings crack under too much torque. Snug, not gorilla-tight.
- Skipping thread tape or silicone. This is the most common source of post-install leaks.
- Mixing incompatible valve brands. Trim and valve must match; a Brand A handle rarely fits a Brand B cartridge.
- Ignoring corrosion. If the underlying pipe is corroded, address it now. See our tips to prevent faucet corrosion and extend the life of your new fixture.
When to Call a Plumber Instead
DIY is the right call for trim and spout swaps, but some situations warrant a professional. If your valve body is leaking inside the wall, if the pipe stub is badly corroded or snaps off, if you have a freestanding tub filler that requires soldered or floor-rough connections, or if your home’s plumbing is non-standard, the cost of a plumber is cheaper than water damage. There’s no shame in calling for backup — knowing your limits is part of being a smart homeowner.
Author Note & Why You Can Trust This Guide
This guide was written and reviewed by the kesfaucet product and installation team, drawing on hands-on bench testing of tub spouts, diverters, and trim kits. Founded as a dedicated faucet and bathroom-fixture brand, kesfaucet engineers its tub fixtures to meet recognized North American plumbing standards (including cUPC/NSF-aligned testing for materials and flow), pressure-tests every spout and valve design before it ships, and backs its bathroom faucets with a manufacturer warranty. We’ve installed and replaced thousands of tub faucets, and every step above reflects the procedures we recommend to real customers.
FAQ
How do I know if my tub spout is slip-fit or threaded?
Look underneath the spout near the wall. If you see a small setscrew (usually requiring a hex/Allen wrench), it’s a slip-fit spout that slides over a copper pipe. If there’s no setscrew, it’s almost certainly a threaded spout that screws directly onto a pipe nipple. This single check determines which replacement you should buy.
Can I replace a tub faucet without opening the wall?
Yes — in most cases. If you’re only replacing the spout, handles, and trim while keeping the existing valve body, no wall opening is needed. You only need to open the wall when the rough-in valve itself is leaking or being replaced, which is a more advanced job.
Do I need to shut off the main water supply?
If your home has dedicated tub shutoff valves behind an access panel, you can use those. Most bathrooms don’t, so you’ll close the main water supply to the house. Always relieve pressure by opening the faucet afterward and confirm the flow has fully stopped before you remove anything.
Why does my new tub spout still leak after installation?
The most common causes are missing or insufficient thread tape on a threaded spout, a missing silicone seal on a slip-fit spout, or overtightening that cracked a fitting. Shut the water off, remove the spout, reapply three to four clockwise wraps of PTFE tape (or fresh silicone), and reinstall snug but not over-torqued.
How long does it take to replace an old tub faucet?
A straightforward trim-and-spout replacement typically takes one to two hours for a DIYer, including cleanup. Stuck or heavily corroded fittings, hard-to-reach shutoffs, or compatibility surprises can extend that, which is why confirming spout type and fixture compatibility ahead of time speeds everything up.
Can I mix a new spout with my old handles?
You can, as long as the finishes match and the parts are mechanically compatible. However, trim and valve cartridges are usually brand-specific, so a new handle generally won’t fit an old valve from a different manufacturer. For a cohesive look, replacing the spout and handles together as a matched trim kit gives the best result.
您好!请登录